The Multi-Calendar simplifies how you track reservations, manage availability blocks, and monitor property changes. With customizable displays, filtering options, and availability tracking, you can efficiently view overlapping events and make informed scheduling decisions across all your listings.
To access the Multi Calendar, sign in to your Guesty account and click  Multi calendar in the side navigation bar.
Set up your Multi-Calendar
Customize the Multi-Calendar to fit your daily workflow and visual preferences.
Personalize your Multi-Calendar
Choose what to display in the Multi-Calendar and the properties panel. Click  at the top-right corner of the Multi-Calendar to open the personalization side panel.
Visible listings information
Under "What listing info would you like to see?", select the listing information to display in the listings panel.

Calendar tapes (Desktop only)
Under "Select which tapes to show and what they represent", customize your calendar's visual appearance. Add color-coded status bars and personalize reservation block colors to match your workflow. Read the icons and colors guide to understand what each color means.
- Reservation status: Click
 to open the icons and colors guide and select custom colors for different reservation blocks.
 - Payment status: Add a colored tape above reservations to show payment status (fully paid, partially paid, or unpaid).
- Guest stay status: Add a colored tape above reservations to indicate guest status (upcoming stay, checked-in, checked-out, or no-show).

Tape and block display
Under "How would you like to view the tapes?", select to view expanded blocks or minimized tapes for booked and blocked dates. Use full blocks for operational views to focus on reservation details. Use tapes to focus on pricing, viewing the nightly rate, and minimum nights for every date.

Visible general information
Under "What would you like to see on the calendar?", select the information to display on the Multi-Calendar. Under Nightly rate, choose to display the current nightly rate or the rate at the time of booking, which is indicated with a green dot.

Weekend visibility
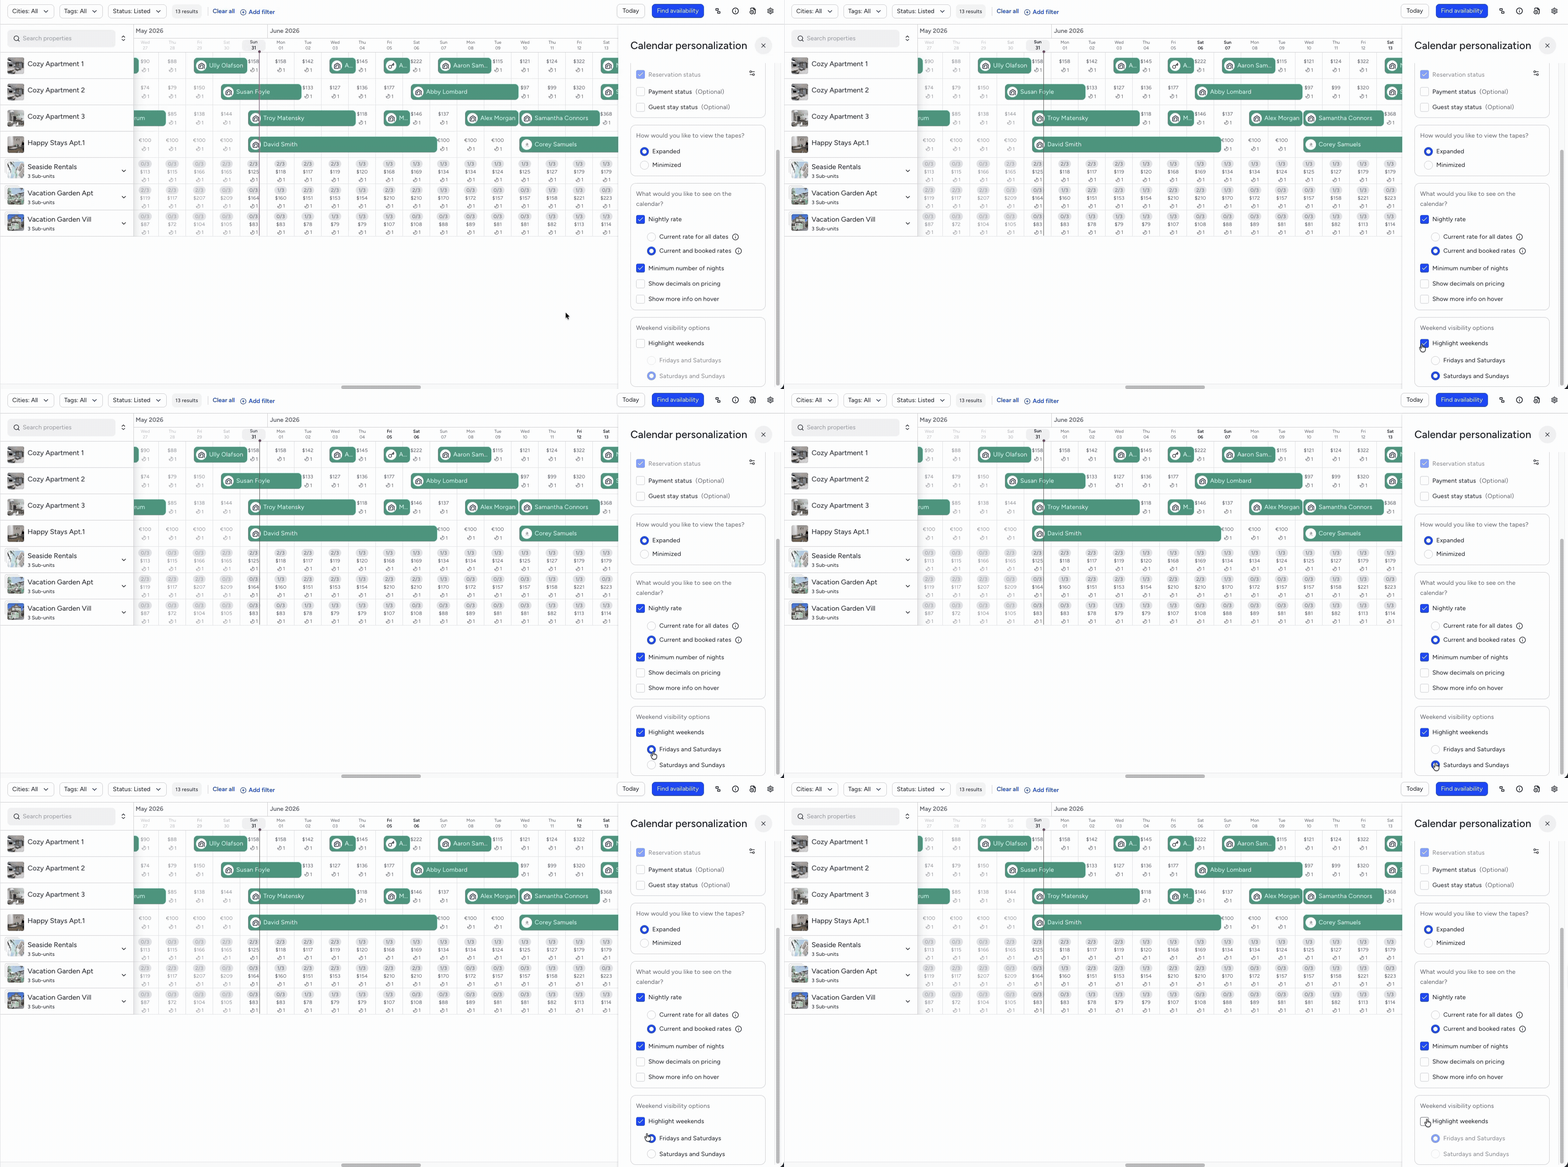
Under "Weekend visibility options", select the days to highlight on the Multi-Calendar. This applies per user and doesn't affect your weekend definitions.
Understand icons and colors
To view a complete guide to all icons and color codes, click  at the top-right corner. The guide opens in the right-side panel and provides the following information:
- What each block color represents (available, confirmed reservation, confirmation pending, etc.)
- Icons on calendar cells
- Icons on reservations and blocks
- Icons in tooltips
-
Desktop version: Click next to any option under "Reservation status" and "Blocks" to select custom colors from a predefined palette for different calendar blocks. You can also view color indicators for payment and guest stay statuses. These customizations apply to your view only, not the entire account.
- "Reservation status": Includes confirmed reservations and reserved reservations.
- "Blocks": Includes no availability blocks. Click on "Other" to include and customize additional block types, such as manual, out of rental period, advanced notice, Smart Calendar Rules, iCal, and preparation time blocks. To revert the customization, click
 next to the relevant block.
Listing sequence
The Multi-Calendar sorts listings alphabetically. Follow these rules to ensure the correct sequence:
- Capital letters: Listings starting with a capital letter appear before those with lowercase letters. For example, "CITY apartment" appears before "City apartment".
-
Numbering: Add leading zeros to numbers to maintain the sequence.
- For sequences up to 99, use 01, 02, etc.
- For sequences up to 999, use 001, 002, etc.
Failure to follow these rules results in an incorrect sequence.
Manage the Multi-Calendar
View overlapping events
Overlapping events appear as overlapping bands on the calendar. If more than two events overlap, a number indicating additional events appears below the bands.
Click this number to see a detailed list of all the overlapping events.

Manage reservations
Track changes
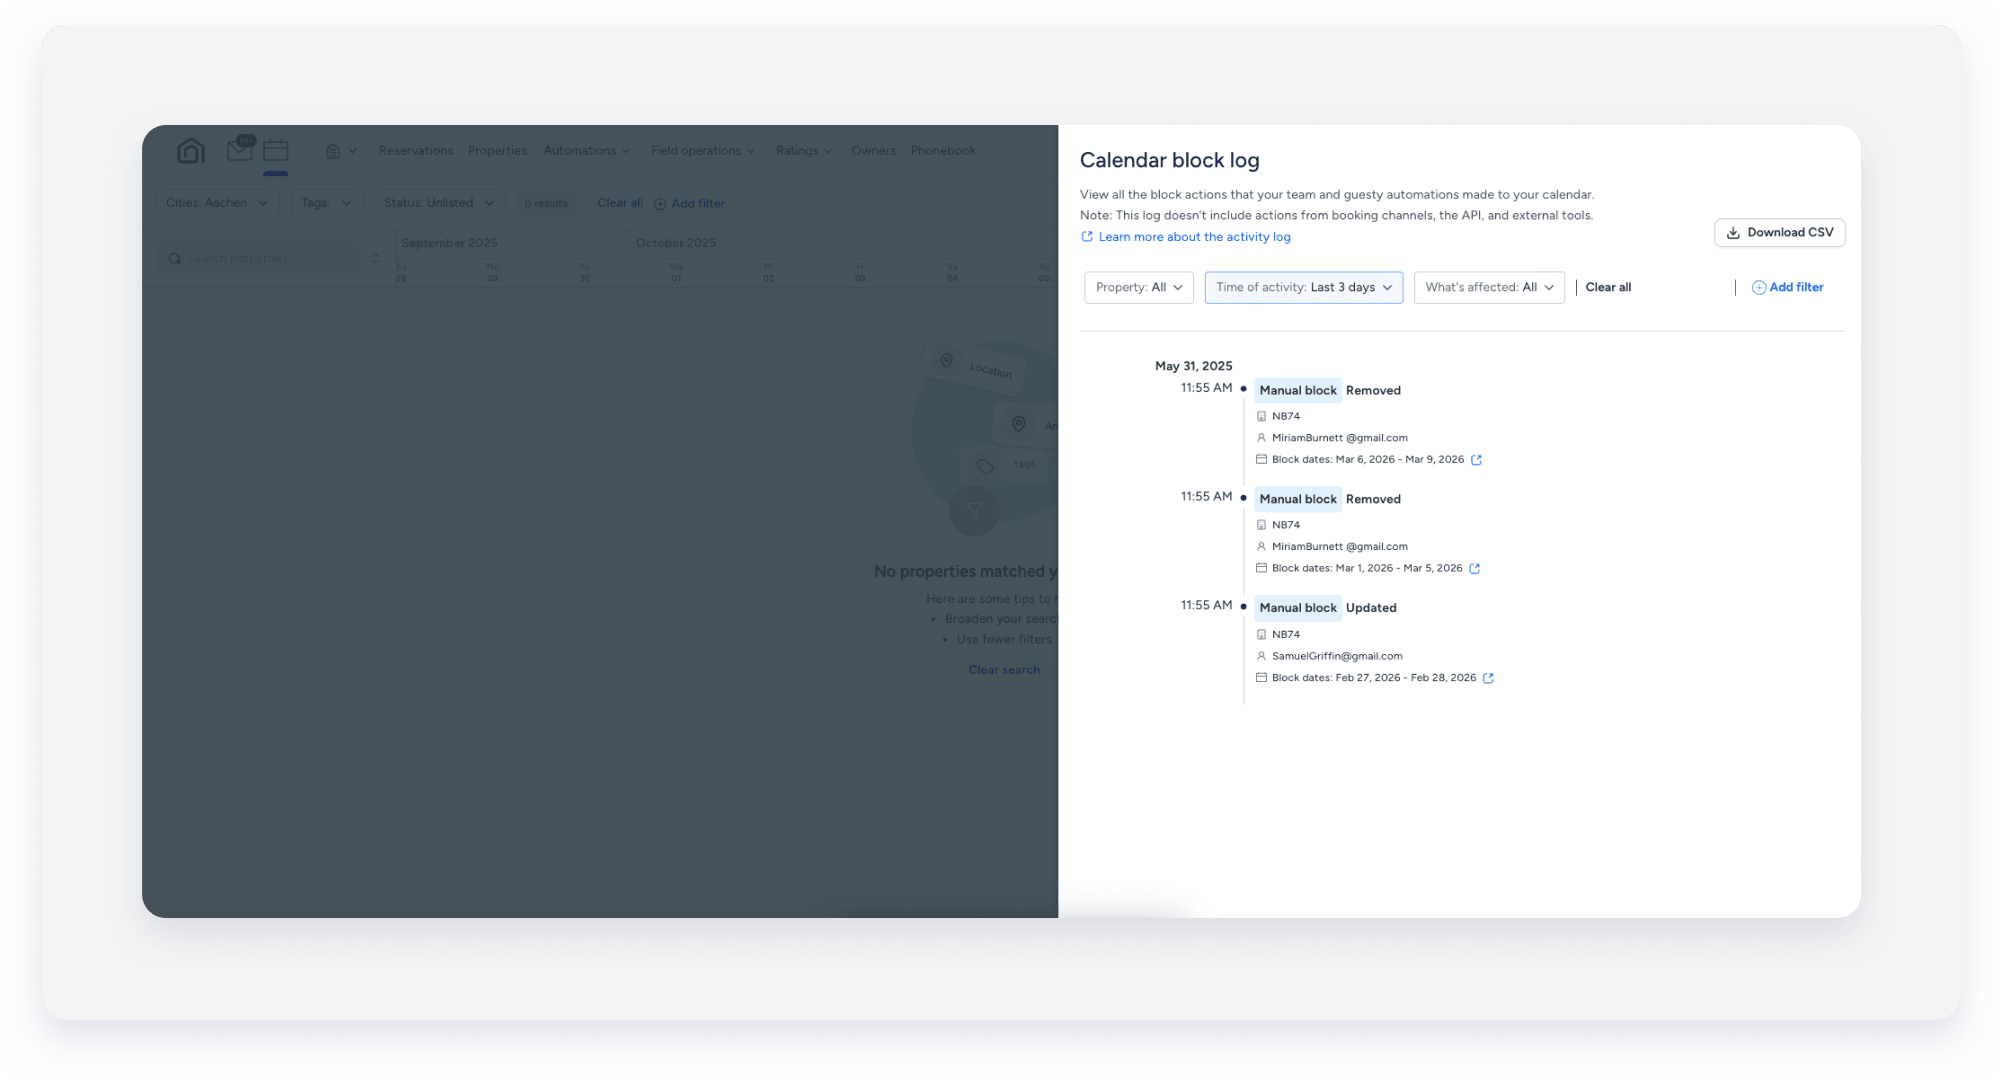
Track all Multi-Calendar changes made since March 2024 using the activity log. Changes made before March 2024 aren’t included.
- Listing name
- Name of the user
- Dates
- Block type (manual block, or preparation time block)
- Block event (created, updated, or removed)
- Block notes (if added)
- Reason for the block
To access the activity log, follow the steps below:
Step by step
- At the top-right corner, click
 .
. - Click +Add filter to refine your search results.
- To reveal the option for custom date filtering:
- Select a specific listing from the filters.
-
After you select a listing, you can set custom dates.
Note:
To use the custom date filter, first select a listing.
- To download the displayed activity log report, click Download CSV at the top-right corner.
Change availability settings
To change a listing's availability settings, hover over any availability-related block on the Multi-Calendar and click Block time settings to navigate to the listing's availability settings page.

