This guide covers everything you need to know about filing, viewing, and editing Guesty Damage Protection claims to help you protect your property and secure compensation for damages.
Limitations
- You can upload a maximum of 50 files per claim.
- Claims must be submitted after guest checkout and within 30 days of the checkout date.
- Claims must be at least $25.
Before you begin
To approve a claim, our claims team needs documentation that clearly connects the damage to a specific covered reservation. Gather the following before you start:
- A detailed description of the damage
- The estimated cost of repair or replacement
- Photos documenting the damage
- Supporting documents, such as receipts, invoices, or estimates
Prepare required documentation
Make sure your documentation meets the requirements below.
Each claim covers one reservation. Only include damage that happened during the stay of the guest listed on the claim.
- Damage that happened before check-in, after checkout, or during another guest's stay can't be claimed under this reservation, even if that stay was also covered.
- Don't combine damage from several stays into one claim.
- Don't submit the same damage on more than one claim.
- Photograph the damage after the guest checks out. Photos of damage taken before the reservation started show pre-existing damage and can't be accepted.
- Keep check-in and checkout inspection photos for comparison. They're the strongest way to show when the damage happened.
- Upload original files straight from the device that took them. We check the date and location saved in each photo against the reservation. Screenshots, edited images, and photos forwarded through messaging apps often lose this data, so avoid them.
- Check your device's date and time settings before taking photos.
- Make sure photos clearly show the covered property listed on the reservation.
- Upload original, downloaded invoices and receipts, such as a PDF from the vendor or retailer. Don't upload recreated, retyped, or manually edited documents.
- Make sure order numbers, seller names, product descriptions, and amounts match the linked order or listing exactly.
- Make sure repair and replacement invoices show the actual work and cost. We may contact vendors directly to confirm the address, the work performed, and the amount billed.
- Use estimates and quotes dated after the guest's stay. An estimate dated before check-in suggests the damage already existed.
We review your documentation as a whole, so one imperfect detail won't automatically lead to a decline. However, if photo dates, property details, invoice information, or vendor records don't match the covered reservation, we can't approve the claim as submitted. In those cases, we may ask you to remove specific items, provide original files, or withdraw the claim.
Verify the following before you submit:
- Check that all damage occurred during this specific guest's stay.
- Confirm that photos were taken after checkout and are original, unedited files.
- Check that photos clearly show the covered property.
- Confirm that invoices and receipts are original downloads, not recreated documents.
- Check that order numbers, sellers, and amounts match the linked orders exactly.
- Confirm that no items on this claim appear on any other claim.
File a claim
Follow the steps below to file a Guesty Damage Protection claim.
Step by step:
- Sign in to your Guesty account.
- In the side navigation menu, click
 Integrations to open the dropdown menu.
 - Select Guesty Add-ons.
- In the Guesty Shield thumbnail, click Launch.
- In the submenu, click Reservations.
- Select the relevant reservation.
- In the "Damage Protection" section, click File a claim.
- Enter the incident details and upload relevant documents, such as photos of the damaged item.
- Click Submit claim, or click Save draft to finish later.
The Guesty Damage Protection team reviews your claim after submission. You will receive email notifications regarding status changes.
View your claims
Track the status of your claims in the reservation page or the Damage Protection page.
Step by step:
- Sign in to your Guesty account.
- In the side navigation menu, click
 Reservations report.
 - Select the relevant reservation. You can use the filters above the table to narrow your search.
- Select the Guesty Shield tab on the reservation submenu.

Step by step:
- Sign in to your Guesty account.
- In the side navigation menu, click Integrations to open the dropdown menu.
- Select Guesty Add-ons.
- In the Guesty Shield thumbnail, click Launch.
- In the submenu, click Claims.
- Click
 to open the claim breakdown, available once the claim is approved.
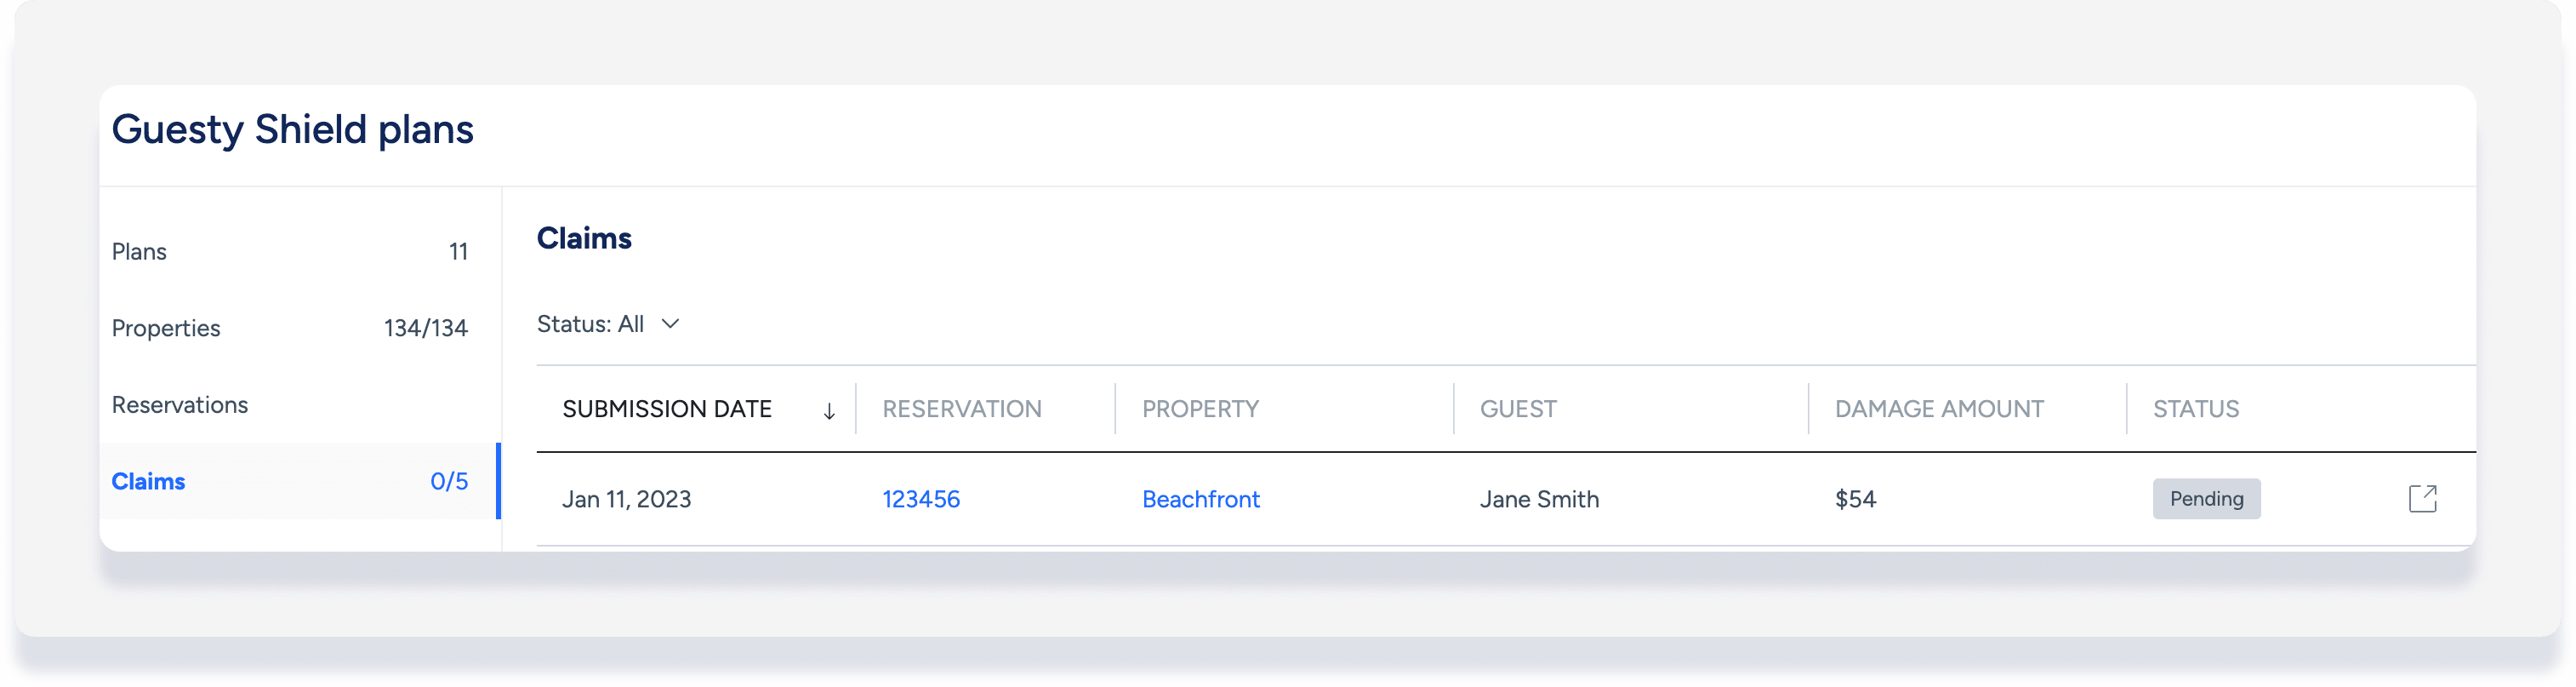
The "Claims" section shows the total submitted and approved claims. The list sorts claims by submission date. Each claim shows the following:
- The reservation number and link to the reservation page
- Property and a link to the listing's page
- Guest name
- Damage amount
- Claim status
You can filter the list by status.
Understand claim statuses
Check the status of your claim to understand its progress.
Status |
Description |
|---|---|
| Approved | The claim was accepted. |
| Declined | The claim was denied. |
| Draft | The claim started but was not submitted. |
| Incomplete | More details are needed. |
| Not qualified | The plan doesn't cover this request. |
| Paid | Payment was processed. |
| Pending | The claim is being evaluated. If you have a question about a claim still in "Pending" status for more than a couple of weeks, contact us. |
| Submitted | The claim has been sent for review. |
| Success | The claim was processed and paid or withdrawn. |
| Withdrawn | You or the insurance partner canceled the claim. |
Edit a submitted claim
You can edit a claim if the status is:
- Draft
- Pending
- Declined
- Incomplete
Important:
Only the admin, general manager, and property operations manager can edit claims. Learn how to assign roles.
Step by step:
- Sign in to your Guesty account.
- In the side navigation menu, click Integrations to open the dropdown menu.
- Select Guesty Add-ons.
- In the Guesty Shield thumbnail, click Launch.
- In the submenu, click Claims.
- Select the relevant claim to open the reservation page.
- Under the "Damage Protection" section, click Edit claim.
- Edit the necessary details (reservation-related details can't be edited):
- Update the amount
- Add or remove items
- Add or remove documents
- At the bottom of the page, click Resubmit claim.
- In the pop-up, click Yes, resubmit claim.